$circleDiameter: 30rem; // Replace X with the desired diameter in rem
$circleRadius: $circleDiameter / 2;
$totalElements: 11;
$angleIncrement: 360deg / $totalElements; // Equal angle increment in degrees
$animationDuration: 12.5s;
@keyframes circle-motion {
from {
transform: rotate(-90deg) translate($circleRadius) rotate(90deg);
}
to {
transform: rotate(270deg) translate($circleRadius) rotate(-270deg);
}
}
@media (max-width:767px){
$circleDiameter: 24rem; // Replace X with the desired diameter in rem
$circleRadius: $circleDiameter / 2;
@keyframes circle-motion {
from {
transform: rotate(-90deg) translate($circleRadius) rotate(90deg);
}
to {
transform: rotate(270deg) translate($circleRadius) rotate(-270deg);
}
}
}
.section.section--proof .dot--large, .circle__icon {
animation: circle-motion $animationDuration linear infinite;
}
@keyframes circle-motion-small {
from {
transform: rotate(-90deg) translate(1.75em) rotate(90deg);
}
to {
transform: rotate(270deg) translate(1.75em) rotate(-270deg);
}
}
.circle__icon {
animation: circle-motion-small $animationDuration linear infinite paused;
}
.statement--wrapper{
.circle__icon{
animation-delay:var(--anim-delay);
}
}
@keyframes element-blur {
0%, 100% {
filter: blur(3px);
opacity:.2;
}
25% {
filter: blur(0px);
opacity:1;
}
50% {
filter: blur(3px);
opacity:.2;
}
}
.logo__item {
@for $i from 1 through $totalElements {
&:nth-child(#{$i}) {
// Calculate the angle for the current element
$angle: $angleIncrement * ($i - 1);
$randomDistanceX: random($circleDiameter+2) + 15; // Generates a number between 10 and 40
$randomDistanceY: random($circleDiameter+2) + 10;
// Generate a random distance from the center
// Calculate the X and Y positions using trigonometry
$xPosition: $randomDistanceX * cos($angle);
$yPosition: $randomDistanceY * sin($angle);
// Apply the translation
transform: translate(
#{$xPosition}rem,
#{$yPosition}rem
);
//transform: rotate($angle) translate($circleRadius) rotate(-$angle);
$animationDelay: ($angle / 360deg) * $animationDuration * 1;
// Apply the blur animation with the calculated delay
animation: element-blur $animationDuration * 1 linear infinite $animationDelay;
}
}
}
@media (max-width:767px){
.logo__item {
@for $i from 1 through $totalElements {
&:nth-child(#{$i}) {
// Calculate the angle for the current element
$angle: $angleIncrement * ($i - 1);
$randomDistanceX: random($circleDiameter+2) + 15; // Generates a number between 10 and 40
$randomDistanceY: random($circleDiameter+2) + 10;
// Generate a random distance from the center
// Calculate the X and Y positions using trigonometry
$xPosition: $randomDistanceX * cos($angle);
$yPosition: $randomDistanceY * sin($angle);
// Change values for mobile screens
$randomDistanceX: random($circleDiameter+2) + 2; // New value for X on mobile
$randomDistanceY: random($circleDiameter+1) + 25; // New value for Y on mobile
transform: translate(
#{$xPosition}rem,
#{$yPosition}rem
);
//transform: rotate($angle) translate($circleRadius) rotate(-$angle);
$animationDelay: ($angle / 360deg) * $animationDuration * 1;
// Apply the blur animation with the calculated delay
animation: element-blur $animationDuration * 1 linear infinite $animationDelay;
}
}
}
}
//counter
.section {
counter-reset: dotCounter;
}
.section .m--card-wrapper {
counter-increment: dotCounter;
}
.section .m--card-wrapper .dot--large::before {
content: counter(dotCounter);
display:block;
color:var(--color--main);
text-align:center;
}
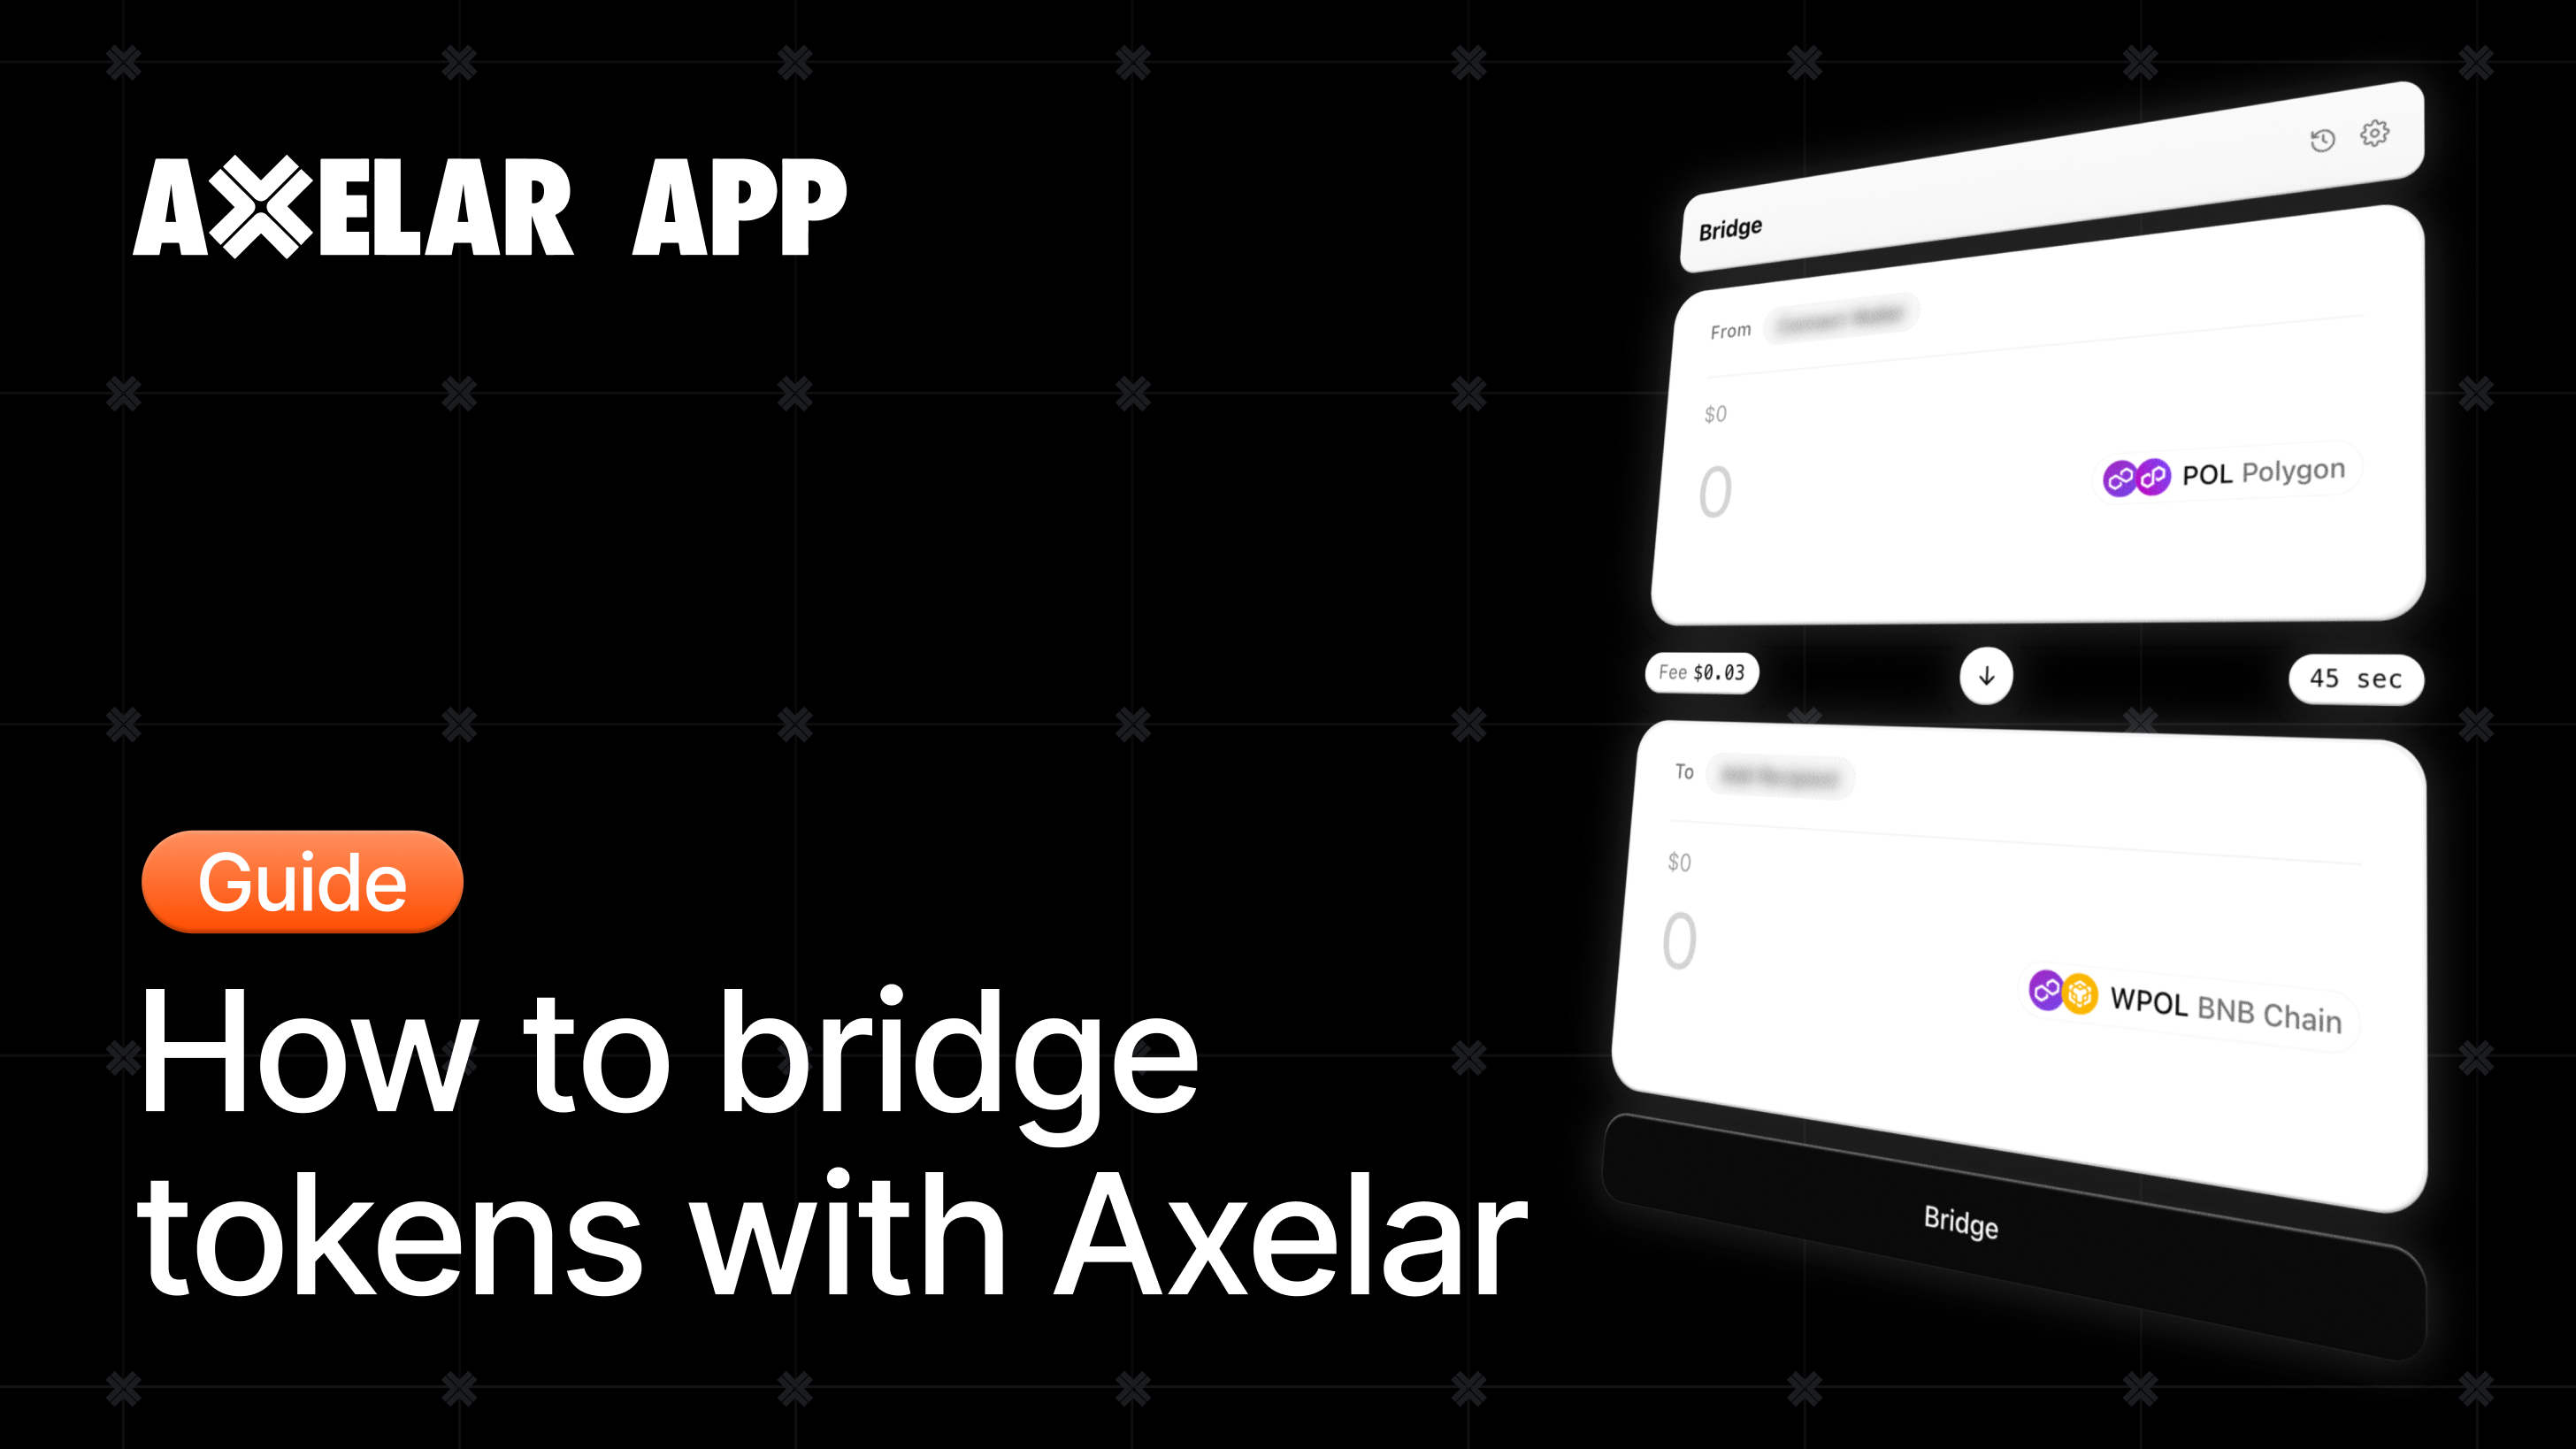
Axelar recently introduced its new interface at app.axelar.network, a new way of moving assets across chains through Axelar’s secure and decentralized interoperability network. The goal is to make cross-chain interaction feel more direct, reliable, and easy to use, starting with asset transfers and expanding over time to support more Axelar-powered workflows.
Below, you’ll find a step-by-step guide to bridging tokens between chains using Axelar. In this example, we’ll move POL from Polygon to BNB Chain.
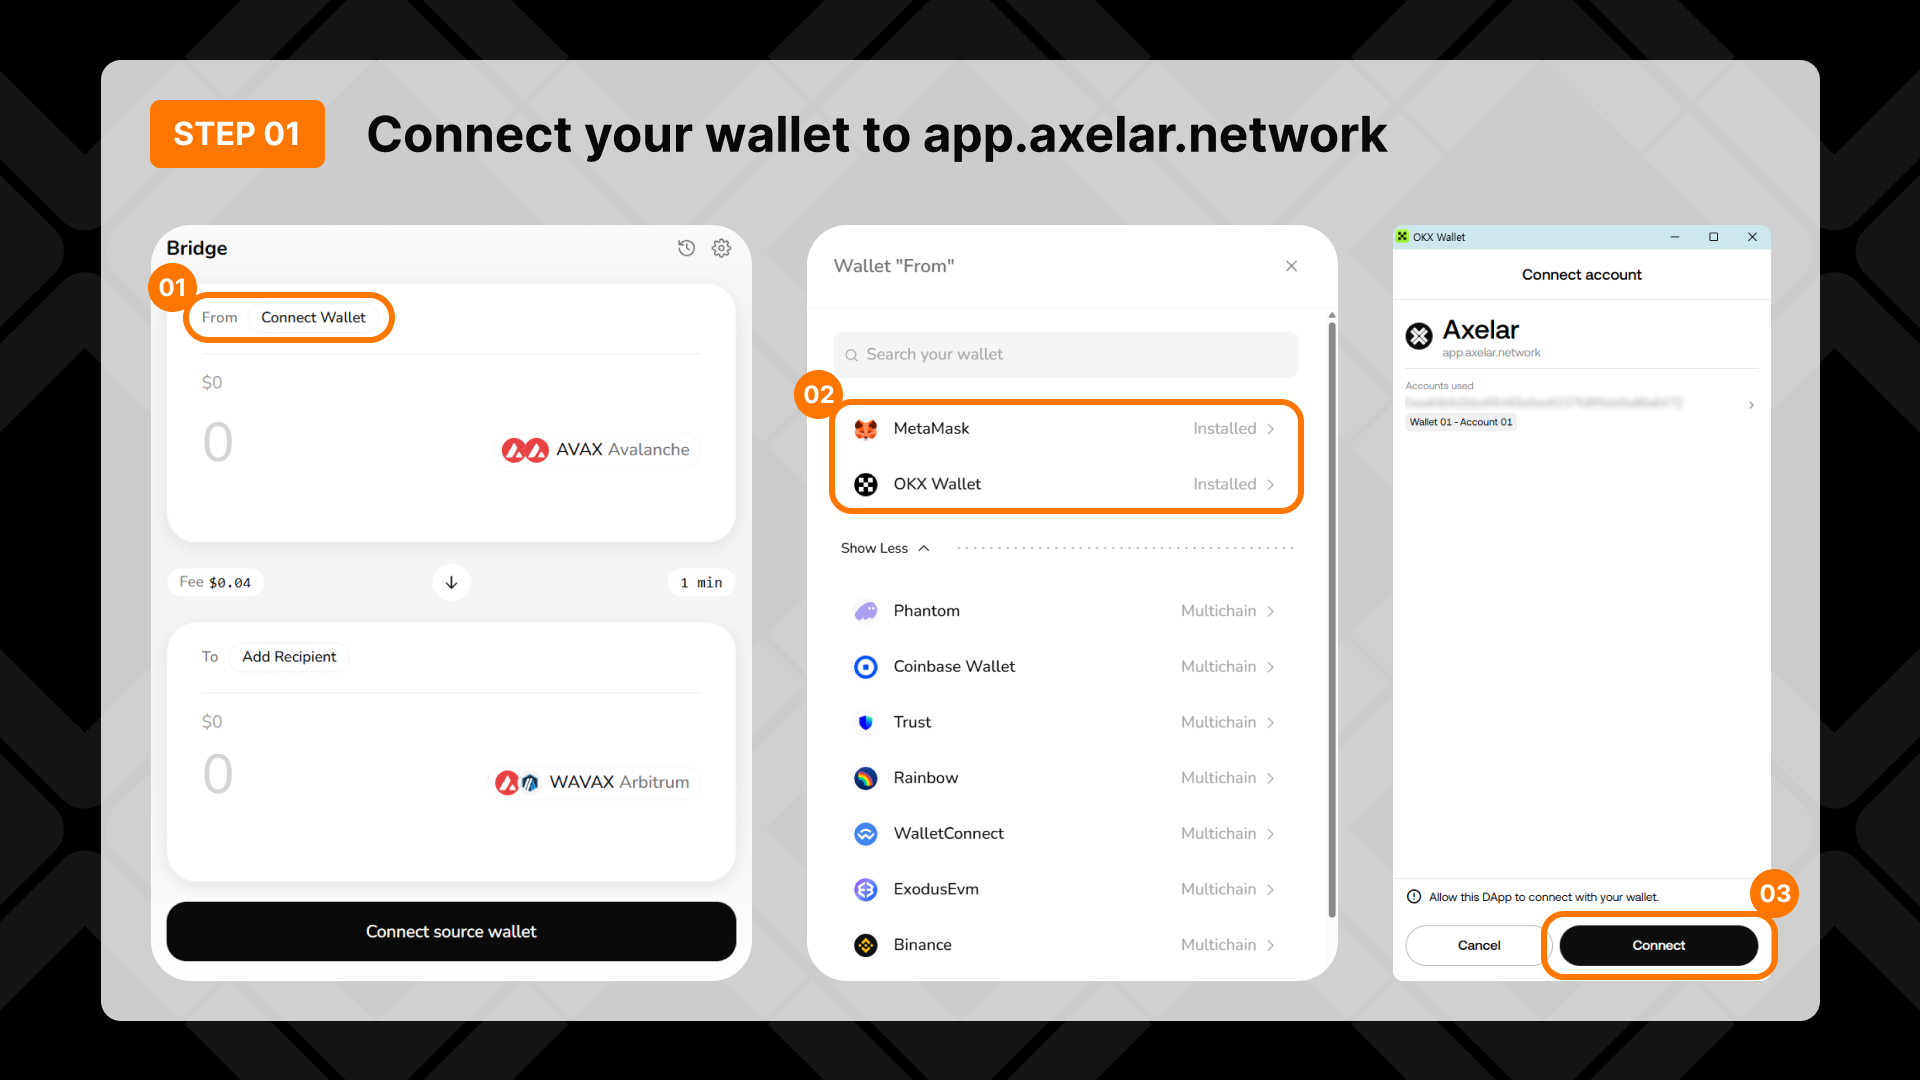
Step 1: Connect your wallet
Go to app.axelar.network.
Click Connect Wallet and choose your wallet, such as OKX Wallet or MetaMask.
If you don’t see your wallet, search for any supported wallet or click Show More.
Approve the connection in your wallet pop-up by clicking Connect.
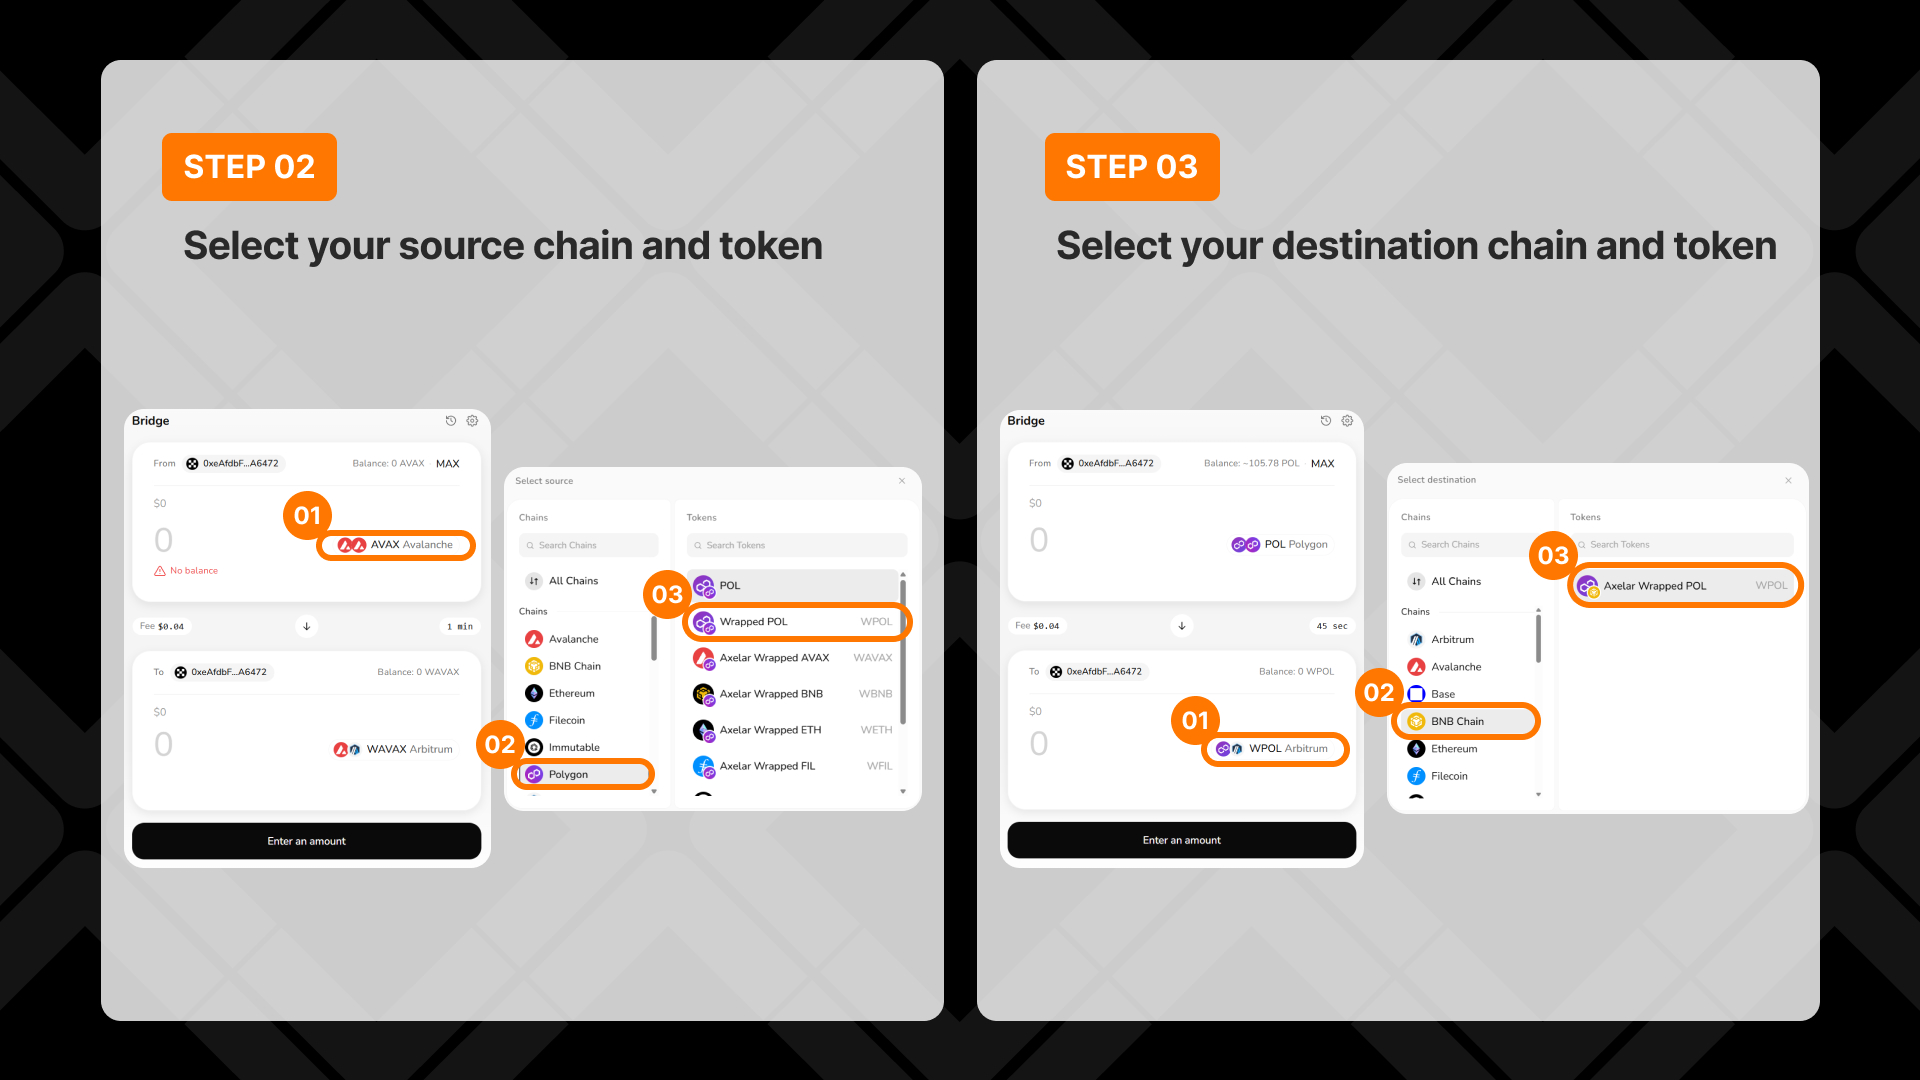
Step 2: Choose what you’re sending
Click the chain and token selector.
Select Polygon as the source network.
Choose POL as the token you want to bridge.
Tip: Use the search boxes to find a chain or token quickly. You can only bridge assets you already hold.
Step 3: Choose what you’re receiving
Click the destination chain and token selector.
Select BNB Chain as the destination network.
Choose WPOL as the token you want to receive.
This means you are moving POL from Polygon to BNB Chain in one cross-chain transaction.
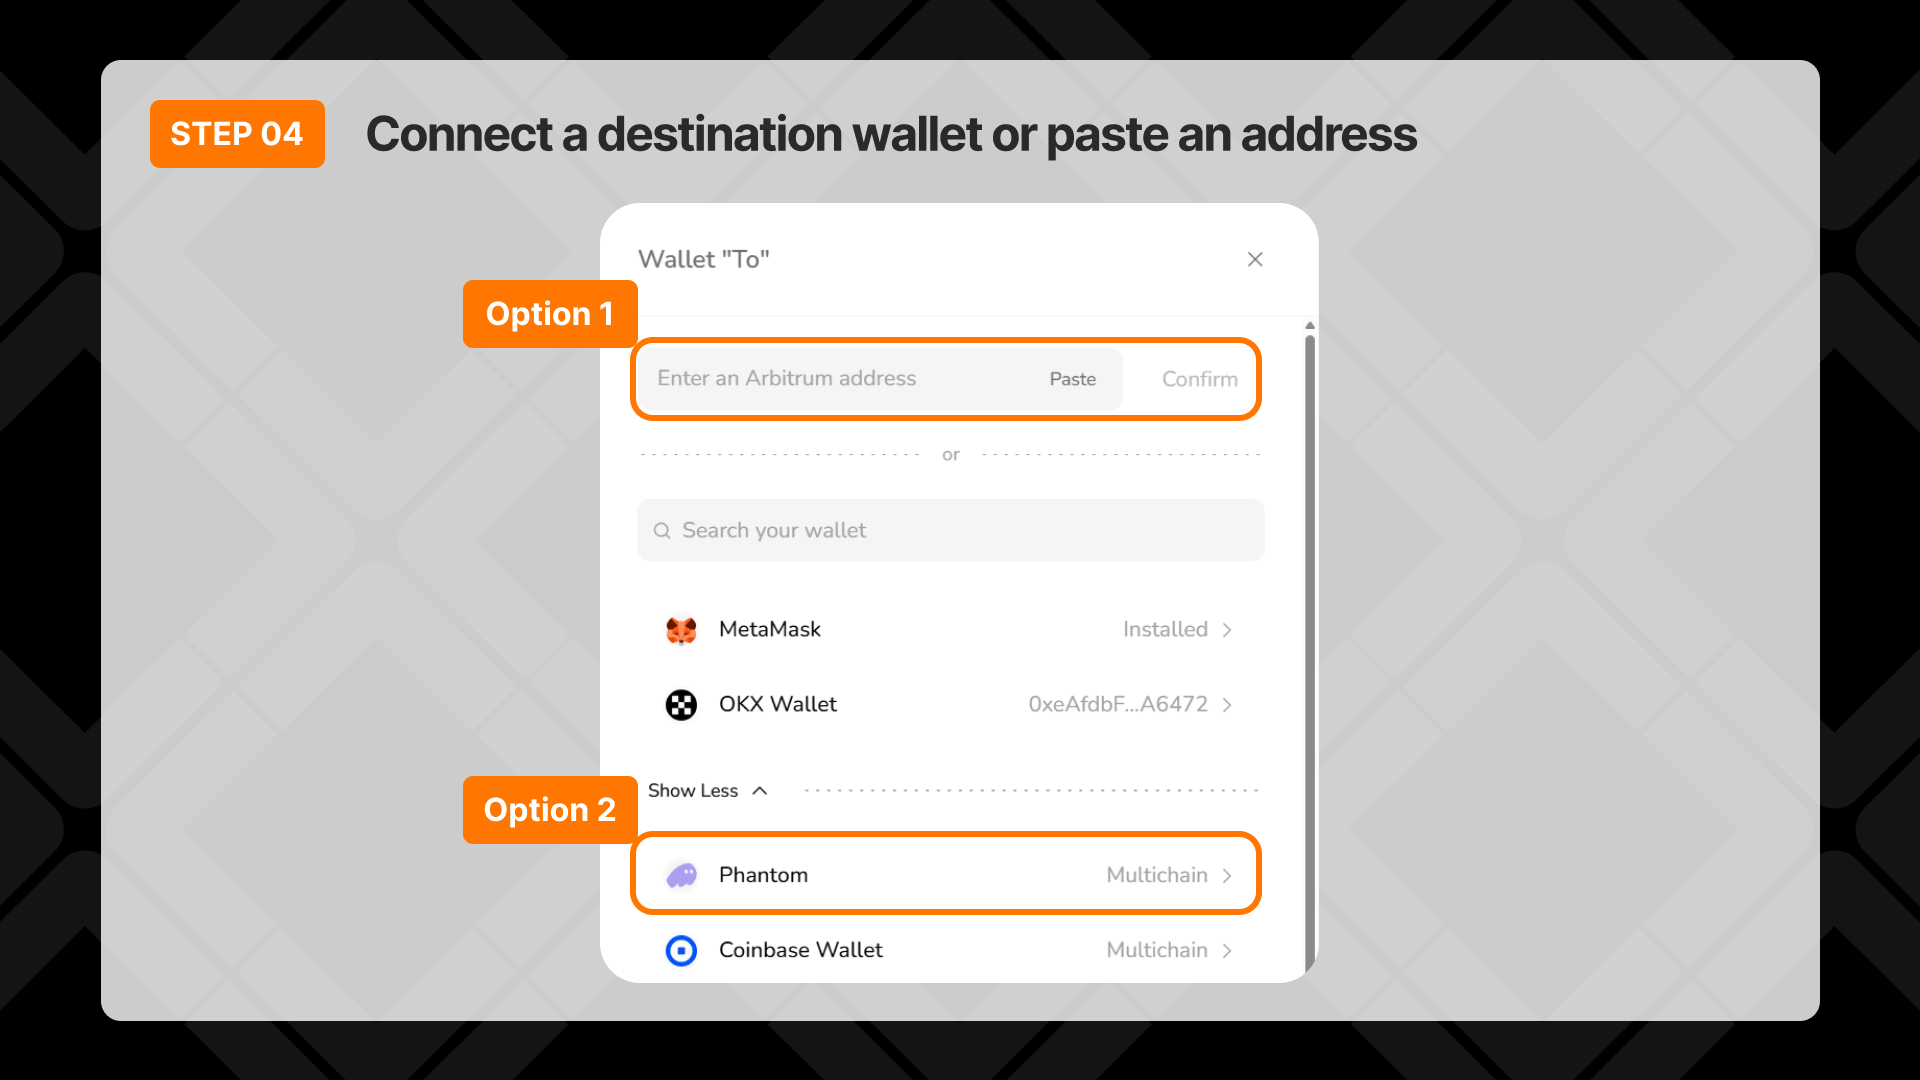
Step 4: Send to a different wallet address
Skip this step if you want to receive the tokens in your own connected wallet.
Paste the destination wallet address, or connect a separate destination wallet.
Click Confirm.
Double-check the destination address before continuing. Once a transfer is submitted, it cannot be reversed.
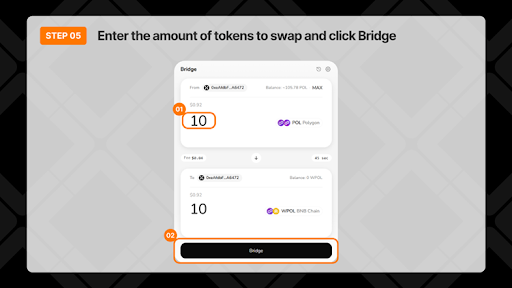
Step 5: Enter the amount and bridge
Enter the amount you want to send, or click MAX to use your full available balance.
Review the fee, estimated completion time, and the amount you’ll receive on BNB Chain.
When everything looks correct, click Bridge.
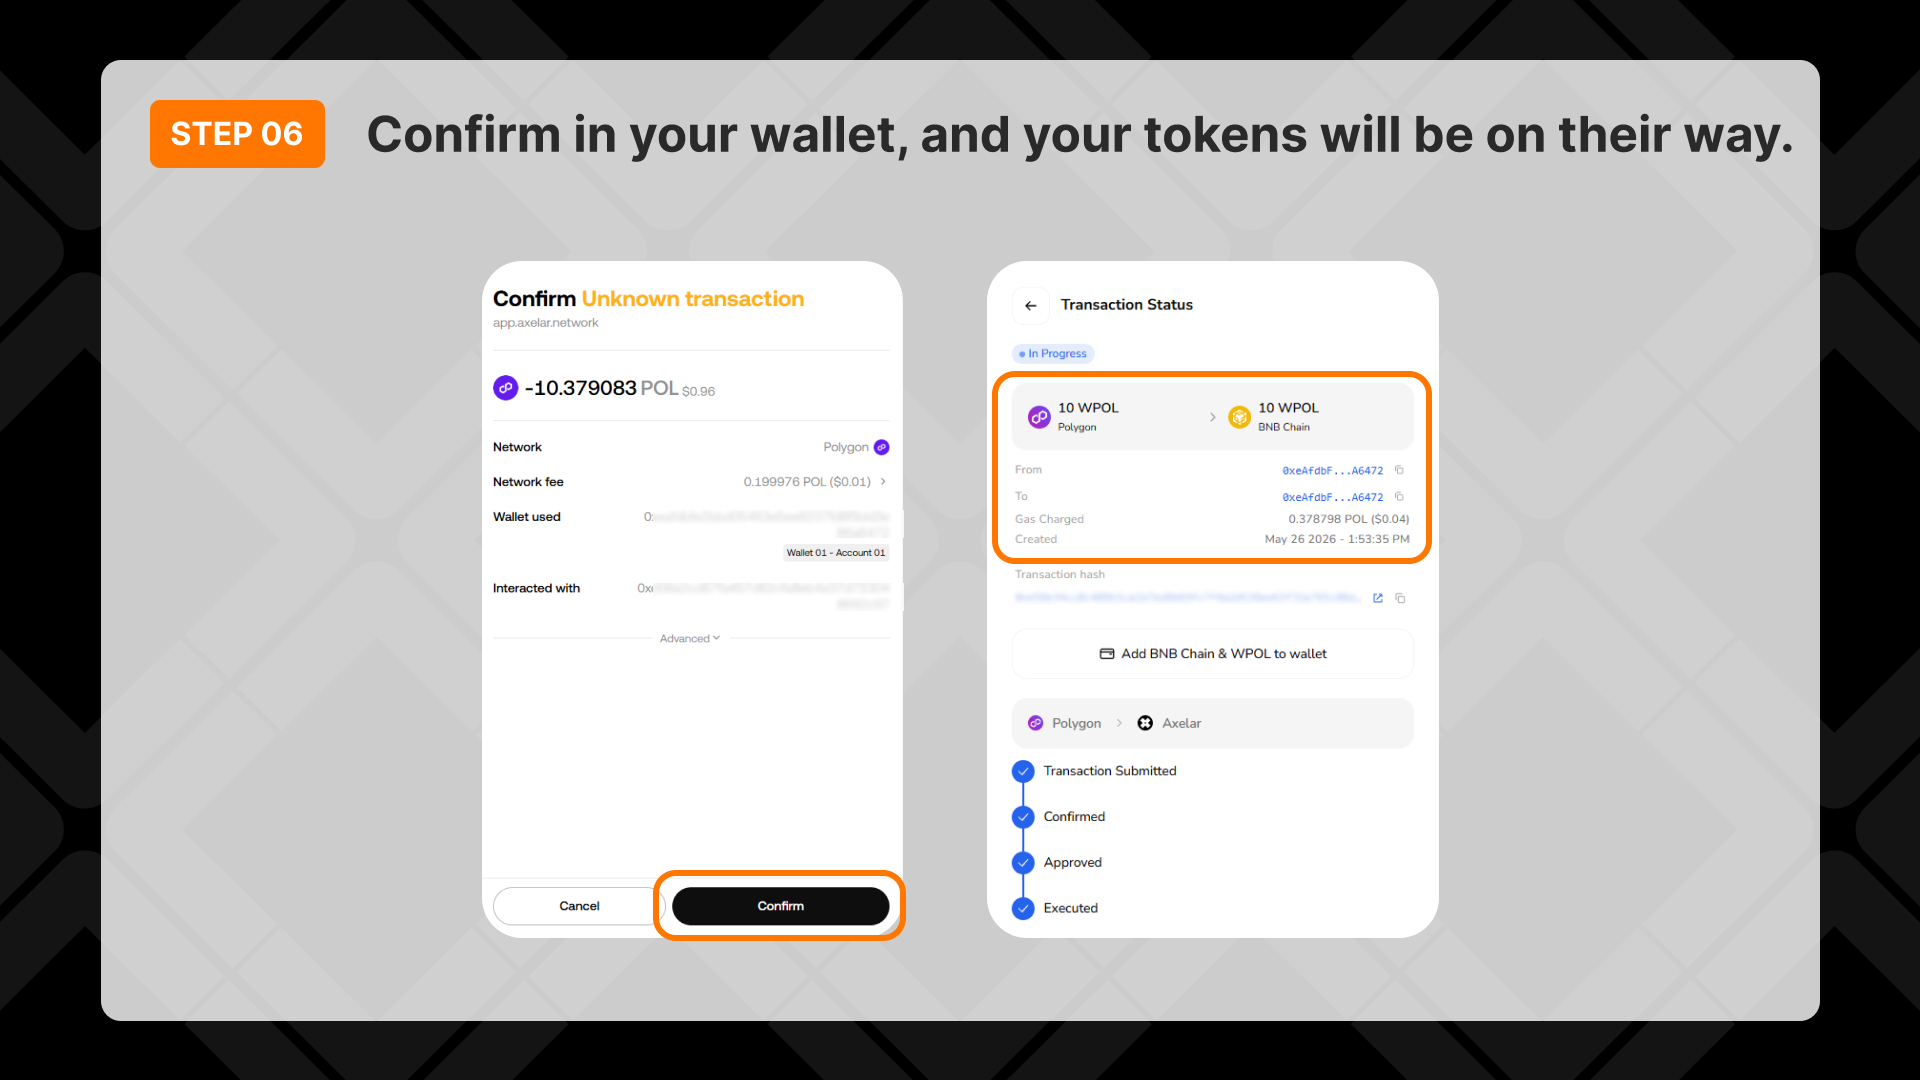
Your wallet will ask you to confirm the transaction. Review the details and approve it in your wallet.
Step 6: Wait for the transfer to complete
Track the transfer on the Transaction Status screen.
The progress will update automatically as the transaction moves through each step.
Once the status shows Completed, your tokens have arrived in the destination wallet on BNB Chain.
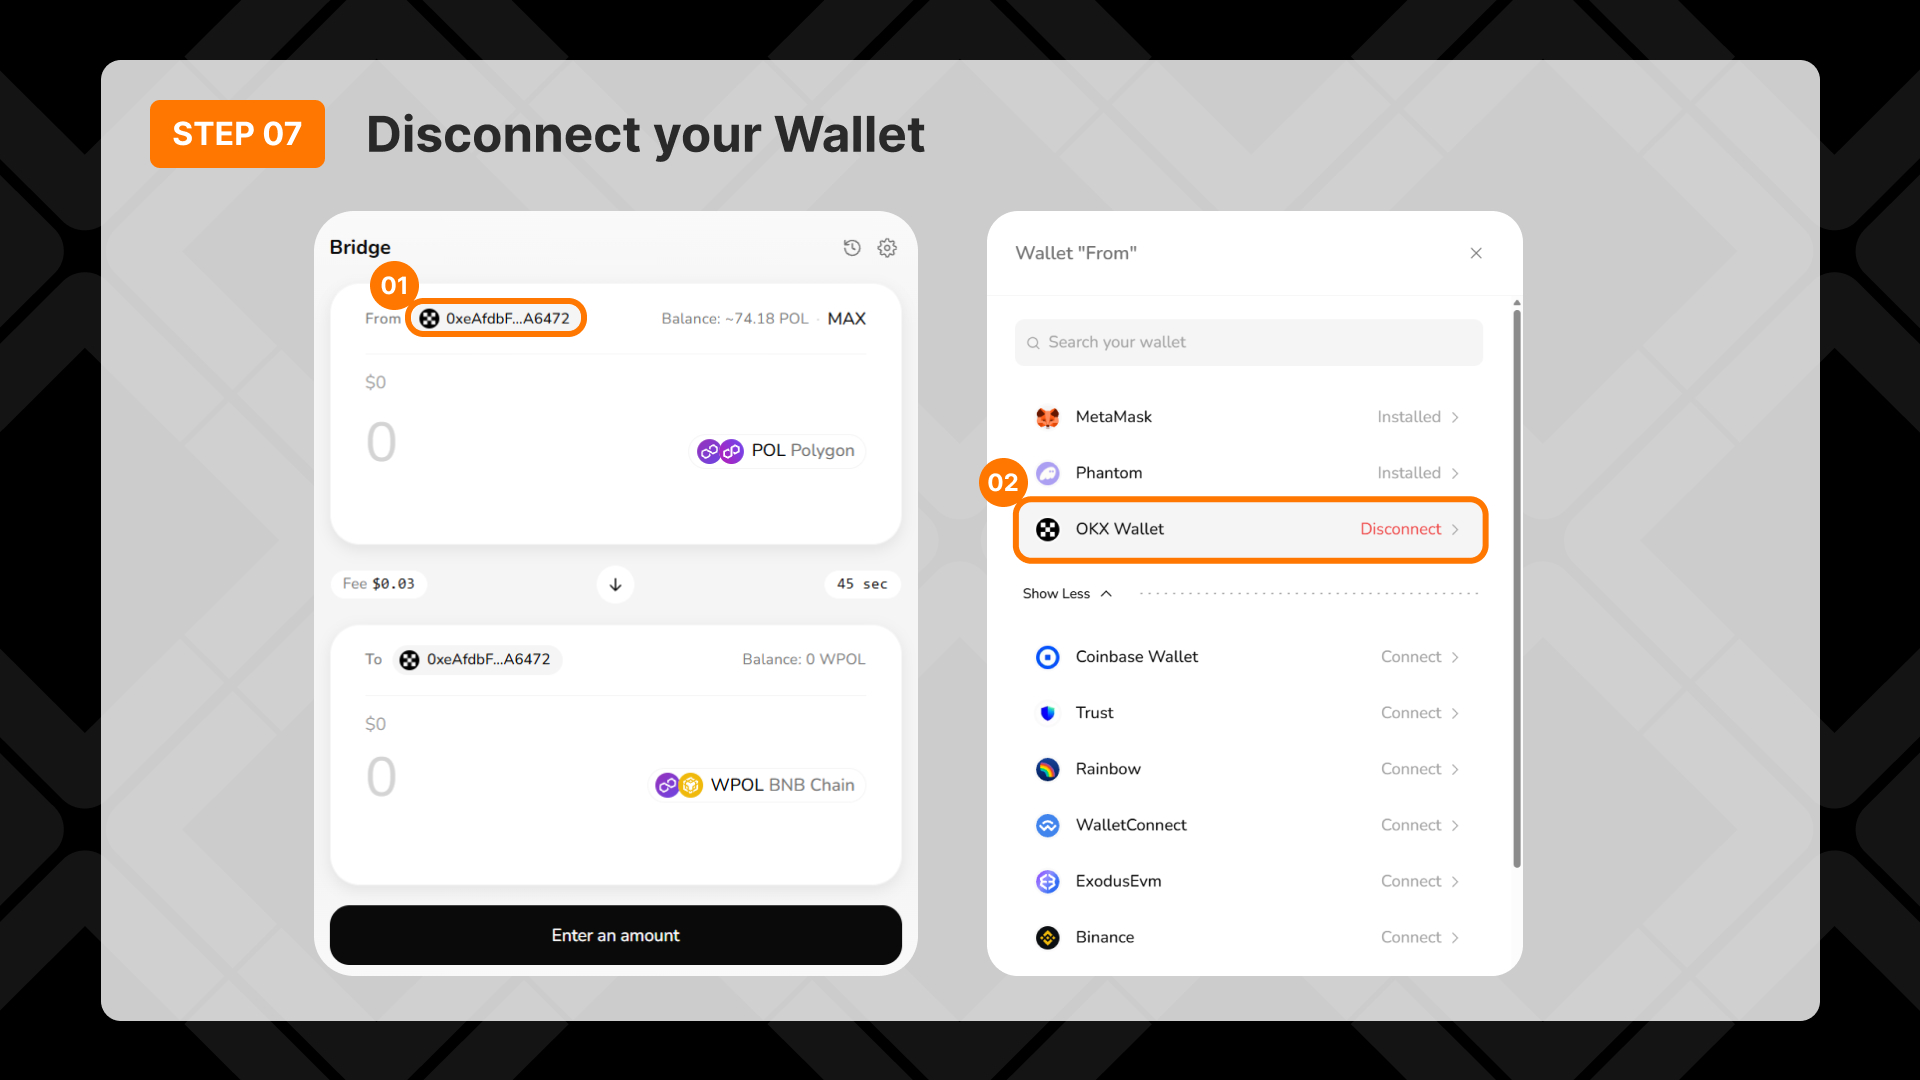
Step 7: Disconnect your wallet (Optional)
Click your wallet address.
Click Disconnect to end the connection.
Axelar has long powered cross-chain movement behind the scenes. Now, users can access that infrastructure directly.